Monday, March 7, 2011

Here's to Easy Peasy!!

Well, spring is on its way, the tulips are poking out of the ground, daylight savings is coming...and here I am again!! I am getting a desperate yen to spray paint something, and I have a ton of fun projects to tackle and share, so hopefully warmer weather and shorter work days will be here soon!! ;-))

In the meantime, I have an easy peasy project to show you that was SO fun!! I've always wanted one of these bed desks...last fall I was given one that had been in a basement and just needed some TLC.


This photo really highlights the basement cruddiness that was on the tray part of the desk...the tray has a heavy cardboard piece that was covered on top by glass. The glass was dirty and just needed a good clean...and the cardboard had water stains, but wasn't warped or damaged in any other way.


So I decided instead of replacing it, I would cover it...I used some spray mount that I had that was about a thousand years old (but still seems to work!), and a roll of wrapping paper that looked like lace over a paper bag...in a cool way...;-))


I also had to clean the desk really well as it was filthy...and replace a little corner piece for stability...


I also decided to go with the distressed look for simplicity's sake...just cleaning between all those little slots drove me slightly batty...I shuddered at the thought of sanding (which I hate anyway) all those tiny, awkward surfaces...shudder, shudder!!


When it is not cool to distress stuff anymore, I will mourn deeply the passing of the trend that is so loved by those of us who don't like work and have the attention span of a three-year-old (or an actual three-year-old ;-))).

So here is the adorable finished product...


Now if I could just get someone to serve me something in bed...;-))

Saturday, February 19, 2011

Here's to Dinos (and other old, slow things!!)

Oh, groan...It's been awhile!! I am starting this year out at a dinosaur pace...:-))

Partly because I am working more outside the home, and partly because I am kind of in a winter of creativity...but sometimes we just have to sit quietly and let the seeds of new things do the great work of preparing to grow!! And in those times it is paramount to hold onto the belief that Spring will come!! :-))

So I have a little project to share with you that I did a while back and never posted...

I started with this picture that I bought years ago at a church garage sale for $1. It was a little 80's-ish, (OK, a LOT 80's-ish) but I thought it might fill an empty space with color!!


So I had it for awhile, didn't really use it, gave it to Mom, she didn't really use it, she gave it back to me, it sat in the garage...then I got a great idea!!


I had this cool dino picture that I got at the local art institute end-of-semester sale and wanted to frame, but just hadn't found the right frame (size- and price-wise). I wanted something that would really highlight the picture and be, well, free...:-))

Oh, how I love it when things come together so serendipitously...:-))


I just disassembled the piece and removed the picture and mat, then spray painted the frame black. (I probably should have primed it, but just did a couple of coats.) Then I took it to my local Hobby Lobby and got the dino top-mounted on a medium-grey mat. The mat plus assembly fee was inexpensive (like, under $15), and saved me the trouble of putting it all back together!! :-)) This picture is closer to the true colors of the piece...


But it's fuzzy, which drives me nuts, so here it is one more time in lovely clarity!! :-))


Of course, the dinosaur craze in our household is now waning, but there is still enough interest that this will be relevant for awhile!! And it's just cool 'real' art for a kid's room!!

Sunday, January 9, 2011

Here's to the New Year!!

Oh, how long it has been!!! I know, I know, a month since my last post...I guess it just goes to show that I am NOT Superwoman!!! :-)) I hope you and yours had a wonderful holiday season...we are off and running into 2011!!

I will start out the year with a little project that I did in December, and used as a gift!! So I thought I would wait until after the gift-giving was actually done to post about it, so as not to ruin any surprises! :^)

I started with this little guy as inspiration...I found him at a flea market as is...


Then I assembled some complimentary fabric, some buttons, and coordinating trim...


And using the bits and pieces, I covered a little cardboard box...I thought it turned out darn cute if I do say so myself!!! :-))


I tucked some jewelry into this little lovely as part of a gift, and it can be re-gifted, or kept to hold jewelry, keepsakes, office stuff, etc, etc...


Here's to a GREAT NEW YEAR!!! Looking forward to lots of wonderful things to come!! :-))

Sunday, December 12, 2010

Here's to Chalkin' it Up!!!


We had a LOVELY winter day last week and I was able to work outside on a few projects, so I thought I'd share one of them...

I got this frame-thingy at a thrift store awhile back, and knew that I wanted to make it a chalkboard...


It was 99 cents...:-))


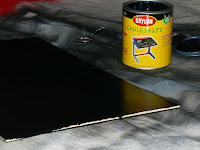
It was made to accommodate an insert, so I measured the inside dimensions and cut a piece of board to slide into it...it was a super thin (about a quarter of an inch, I think) piece of plywood that I got at the local hardware store for about $4. It was actually for a different project and there was just a lot left over...then I painted the cut piece with chalkboard paint...


I was *honestly* not painting in my driveway in the middle of the night!! It was dusk when I took the pics, and turning on the flash just made it look darker...really!!! I did the recommended two coats, and then just decided to be done because I am so impatient like that!! And it works fine, but since it was unpainted wood, it would look better with more coats, so I might try to do that next spring. (Really, I should have primed, then the two coats would have been fine!!) So here it is...


I love the red color on this, and it will go great in my living room when the Christmas decorations come down!! Two more weeks!! Aaack!! :-))

Saturday, December 11, 2010

Here's to Holiday Crafting!!

Ahhh...so much time, so little to do...

Wait...other way around!!! (I love that movie!! :-) So here it is, what, two weeks til Christmas???!!! And all the little loose ends to tie up, last presents to find, traditions to keep! :-)) In the middle of everything, I thought I would try making some cute holiday servers, kind of a take-off on the cake plate I did as my very first post!!

I used super glue for glass, although I just used regular super glue the first time around, and it worked great!


Then I gathered some really cute holiday plates, votive holders, aperitif glasses, whatever caught my eye, and started playing around til I thought something worked...


These would all work as really cute candle holders, but you could also put little faux or real flower arrangements in them for use as centerpieces or decorations. I also made these two tier servers that could be used to serve dessert, appetizers like crackers and cheese, or for holding jewelry, or arrangements for a centerpiece. There are just a ton of ways to use these little beauts. That's why I thought I would make them a little more generic...


Hope your December is going just swimmingly and everyone is enjoying all the great sights, tastes, smells, and sounds of the season!!! :-))

Wednesday, December 1, 2010

Here's to Advent!!

Awww...It's finally December!!! I thought I would start off the month with a little advent wreath make-over...YAY for Christmas candles!!

I started off with this...


I am as nostalgic as the next gal...but when my Mom gave me this blast from the past, I knew it couldn't stay this way!! This light made it look its very best, but it smelled like old plastic, was harboring several tiny bug carcasses, and was SERIOUSLY dusty!! So I started thinking about how I wanted to remake this little lovely, and here's what I came up with...(I think you'll like it :-))


Yeah, OK, I'm not a magician ;-)) But when I started thinking about advent wreaths, I just began seeing them everywhere...and how sweet is this simple little version???!! Little it is, too...


Then, I got the inspiration for this one...


I know, I know, its probably already been done...but no matter...I LOVE it!!! Modern, simple, easy, stunning!! I just stuck the candles in the decorative rock, but to really use it, I would affix them more securely. You could hot glue them down, or stick them in floral foam...(if its not flammable...which I don't think it is...but I don't really know...the flammability of floral foam has never come up as an issue for me before...:-))

ANYwhoo, to get back to the original wreath...I took it all apart and just kept the skeleton wire frame with candleholders, added a dollar wreath for updated greenery, and then set a salad plate in the middle with a favorite angel from my little collection...


Traditional, simple, easy, beautiful!! The hardest part of this super-fun project will be deciding which one to actually use :-))!!!


(OK...would it be total sacrilege to call this the original *Peace Out*??? Hee hee hee and ho ho ho :-))))

Sunday, November 28, 2010

Here's to Pumpkin Goodness!!

I just love this time of year with the holidays in full swing...when the world just seems to take a deep breath and calm down...my to-do list shrivels up, and...oh wait...that's in my alternate universe!!!! ;-)))

Well, with the weather getting colder... I am going to have to find something to take the place of all my spray painting projects, so this post is a little different!! I thought I would share my recipe for the Easiest Ever Pumpkin Cookies...seriously, folks, these are beyond simple!!


You start with these four things, spice cake mix, canned pumpkin, some sort of delicious icing, and a stove...OK, OK, you also need a bowl, mixing spoon, and cookie sheet...but seriously...THAT'S ALL!!!!

Mix together the pumpkin and cake mix...(and I should note here that I am totally un-brand loyal...I literally just photographed what was in my kitchen at the time...Betty Crocker must have had a sale ;-))


It will be a little dry at first, but it blends together quickly.


Drop by any size spoonfuls onto cookie sheet...


(As you can see, perfection NOT required!!) Bake at about 350 F for about 10-15 minutes.


And ice with your favorite...butter cream or some sort of cream cheese frosting works great if you swing that way...;-))


Really, the only downside to this recipe is that it never makes enough!!! :-)))