Friday, November 12, 2010

Here's to Adorable Little Boys!!

Get ready to amp up the cuteness in here!! :-)) I was so pleased with the results of this little makeover...and it was really very simple! I started with two pictures that had been given to me by sis HBAPJ (she gives me the best stuff :-))...


They had a dated look, and the frames really screamed 70's!! (They actually look much better in this picture than they did in real life!!) But their adorable little faces kept drawing me in...I just couldn't put them in the give-away pile!!


So after living with them for awhile, I decided that they needed a little revamping...spray paint, here we come!!

I took the pictures out of the frames, and sprayed the frames with an almond color that I thought would compliment the colors in the pictures better than straight white...then I distressed the frames (meaning I didn't spray paint them perfectly and when they were dry, I sanded them a bit - easy peasy!!).


Delightful, but I had one more charming idea!! I took a *smidge* of Mod Podge,thinned with a drop of water, and painted it on a few highlights in each picture, then added just a skosh of glitter...


OH SO PRECIOUS!!! (And very subtle in real life!!) I just love the hint of sparkle that catches the light, and the frames now compliment the soft colors of the boys instead of overpowering them!! What charming art for my own towhead's room!! :-))

Thursday, November 4, 2010

Here's to Just Going For It!!!

Today's project is a lesson in what CAN work!!!

I picked this footstool out of a neighbor's trash pile...(words I swear to you I never thought I would say...I am becoming one of THOSE people...;-)))


It was a little rough...but the shape drew me in, and it was really solidly constructed with a cute little lid and storage!!


I SO love multifunctional furniture!!!

My initial thought was to just clean this up and spray paint the heck out of it...then I started thinking twice...I worried about the wicker not holding up, the paint not going on well then flaking off right away, and the seat cushion getting messed up in the cleaning process...


BLAH...

...so this sat in my garage for a few months...until the spurt of cold weather (and the growing pile of *projects* in my garage, this being one of the easier ones) convinced me that I needed to do something with this little guy...

I put it in the Goodwill pile, sadly certain that I really couldn't fix this one...

Then after not getting to Goodwill for a week, I decided that if I tried to paint it and it didn't work, it wouldn't really be in any worse shape for Goodwill, right?? (Ummm, logic anyone?!)

So I did it...I got out my handy dandy black spray paint and tarp and went to town...


WOW, WOW, and WOW!!! I couldn't have been more surprised at how well it went!! The paint went on easily, covered well, and looked great!!


So in one of the easiest 15 minutes of spray painting ever, I got a great new-looking little footstool!! Now, I don't even use expensive paint...oh no, I use the cheapest 99-cent spray paint I can find...

(Kindof reminds me of the classic, "Waiter, this wine is old...bring us a bottle of your FRESHEST wine..." :-))) Love me some Steve Martin!!

So anyway...IT WORKED!! GREAT!! I love my cheap spray paint!! And just to give this guy a little more protection, I put on a quick coat of sealer. :-)) Done!!

Saturday, October 30, 2010

Here's to Halloween!!

Happy Halloween!!

I haven't been in much of a spooky mood lately...I've only done a little fall decorating this year...


I even let nature decorate my pumpkins...


But really...I couldn't have done better!! :-)))

My leafy outdoor bouquet was about as Halloweeny as I got...


But I did have a lot of fun making these autumn cards...I used an old Mary Engelbreit desk calendar that I cut up then added a little embellishment...


I am definitely not selling these (actually, if you are family, you might see one soon!! :-))...so don't worry, Mary, no copyright issues here!! :-)) It was a fun way to recycle some adorable little images and spread some autumn cheer!!

Thursday, October 28, 2010

Here's to Time!!

So here is a fun project I did recently!!


This cute little platter came in a garage sale box of other things that I wanted...I actually tried to leave it there (as I am pretty sure it is missing a glass insert of some kind that fits in the middle), but no dice!!! And I really wanted the other stuff in the box...:-)) That means I get to call this *free*, right!!


Not that I don't appreciate the silvery/flowery cuteness of it all!! But what to do with it? I almost gave it to Goodwill about three times, and just never quite could...Then inspiration hit!! A clock!

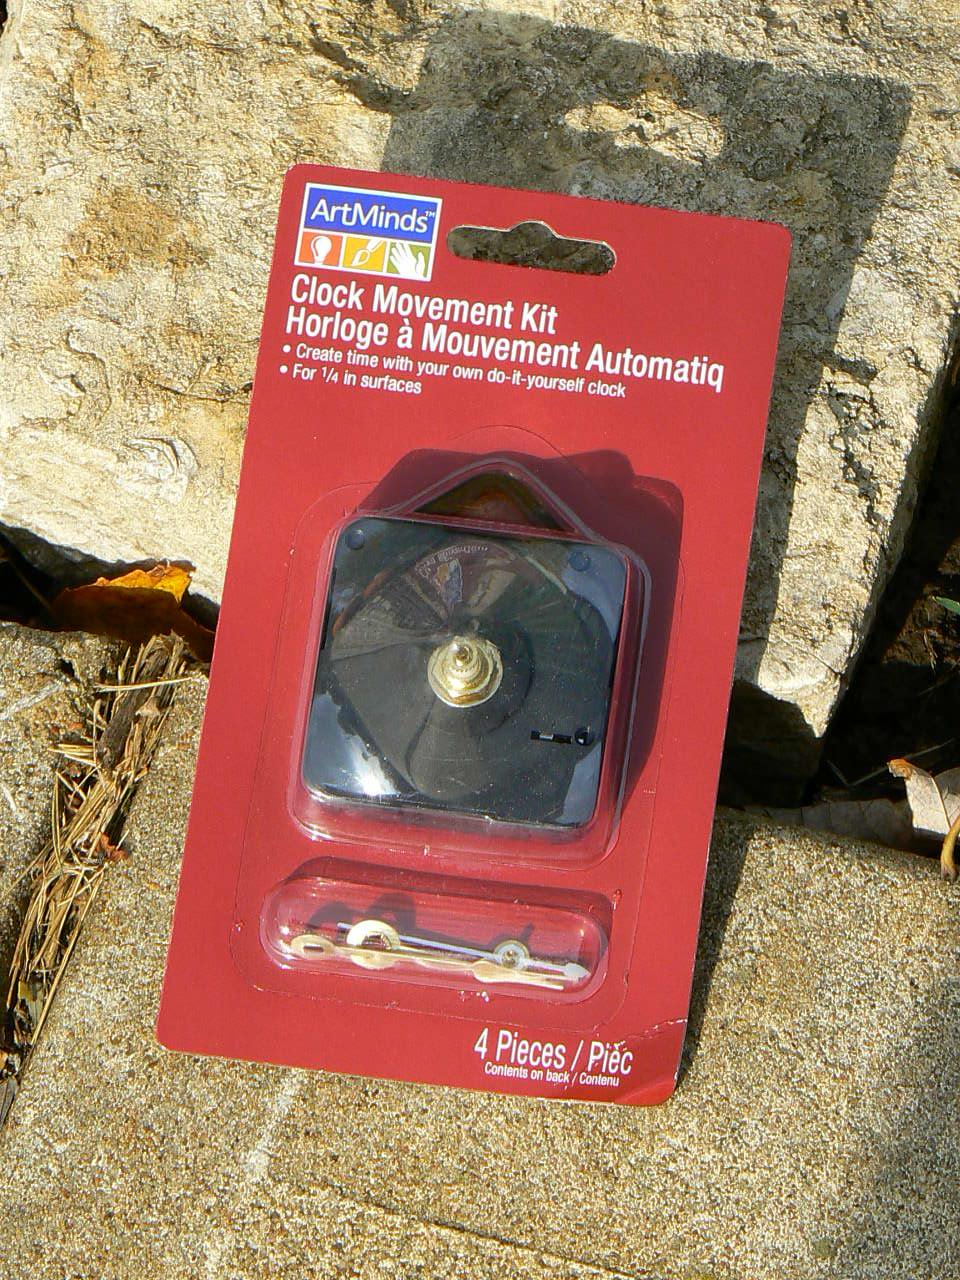
I had a hole drilled in the center of the platter (drilling is WAY past my pay grade ;-)) and bought a little clock-making kit at a craft store.


I also bought longer, black hands (that I didn't take a picture of), as the hands that came in the kit were tiny and gold-colored, not so great with a silver back drop...I thought it was HILARIOUS that the kit said I could "create time"...if only, right!!!!!


Not so hilarious were the total lack of instructions regarding assembling of said do-it-yourself time creation dohicky...But after a little bit of fiddling, I got it together...really, it was fairly straightforward and I didn't even break anything!! YES!! :-))

I finished after dark, so here is my cruddy indoor picture of the finished project...


I wasn't sure about it 'til I hung it up on the wall...so cute!! And it was really so easy...will definitely be "creating time" again soon up in here!! ;-))

Saturday, October 23, 2010

Here's to Kiddos!!! :-))

I have kiddos!! Love 'em!! So I thought I would post a few ideas I have had for entertaining them and corralling the massive amount of STUFF that comes along with the little lovelies...:-)))

I don't know about anyone else, but we seem to get a promotional mailing from the local car dealerships about twice a day...seriously!! And they often have a 'real' key that MAY start a car that we COULD win...haven't yet :-((

So one day as I was about to drop the fifteenth key in the trash, I got the brilliant idea to let child #2 have his own keyring...as he is all about driving...(Funny story - right before his third birthday he actually told us that when he turned three he could probably drive...so cute!!)


#1 - great way to reuse those FREE keys that come along, and #2 - his own keys to 'start' any engine!!


Next we have the wall of art!!

I knew when my kiddos were little that it would drive me crazy to have paper all over the frig...there had to be another way!!!

I needed a large space and a way to easily change out whatever paperwork / artwork would be displayed...enter our long empty hallway wall...the PERFECT palette!!


This hallway is so long and narrow it is terribly hard to get a good picture...but I put four small nails in the wall in a roughly trapezoidal (yup, its a word - I checked ;-)) shape. Then I wrapped twine around the nails to outline the top and bottom of the trapezoid and inside the trapezoid in an 'X' shape. (Use the word 'trapezoid' often?? teehee ;-))


I used clothespins to hold the gorgeous artwork...and voila!!


I love how easy it is to change stuff out, and it fills up the big, white, empty wall that needed something!! (And my frig is perfectly clear except for the zillion alphabet letters on it!!)

And last but not least - big machines!!


Construction equipment is serious business at our house...but I realized early on that it would just be more fun to have something to *actually* dig...so I got a couple of bags of decorative rocks (much cleaner than those gathered from the yard, since this would be an inside work-site!!), and a large, flat grocery box...great for digging, dumping, AND storing the big machines as the whole thing can be pushed under the dresser when no work is scheduled!!!

Friday, October 15, 2010

Here's to ART!!!

Oh how time flies when you're doing laundry, cleaning house, making dinners, learning multiplication, working in the yard, getting out winter clothes, putting winter clothes in the garage sale pile and getting new winter clothes, washing dishes, etc, etc, etc!!! ;-))

I know, I know, everyone's busy, right!!!

This little project took me awhile to complete...I had to figure out some logistical issues, being construction-challenged as I am...but I think it turned out fairly well!!

This is what I started with...


It was the frame of a table umbrella that had gotten hit hard in one of the storms last summer, and I just thought there might be something interesting that I could do with it other than throw it away...

First I dissassembled...


...just took everything apart with screwdriver and pliers...then looked at what was there. I don't know why, but the long thin pieces looked to me like they might make a good easel, so now I had a plan!!

The long thin pieces would be the legs of the easel, and they already had a hole through one end, so I measured how long of a screw I needed to go through all three pieces, then went to the hardware store and totally guessed about the diameter of said screw!!! (It just felt right ;-)))


I also got a length of chain and some "screw eyes" (I just have to say here that that name makes me laugh...don't know why I just giggle at it...teehee!!) and a set of two small L-brackets with screws. I am not professional enough at this to have thought about taking pictures of all of those things before I used them, so let me know if clarification is required!! :-))

The "screw eyes" (teehee!!) and chain were placed on the middle of the easel to assure that the easel won't slip and collapse...


And the L-brackets were used to attach the shelf piece to the legs...


The shelf piece was just an extra bit of left-over board, so the total cost of this project was less than $5...just the cost of the hardware!!

And voila!! Here is the assembled easel...


It's a great height for grade-school kiddos, bigger than toddler-size, but still a bit smaller than adult size. Since the wood used is two different colors, I could paint (or stain) the whole thing to make it more professional looking...(isn't there something inherently ironic about painting an easel?????? ;-))

I kindof like the rawness of it, though, and this way, nothing will be "ruined" if my little Rembrandts decide to become Jackson Pollacks!!!!!! ;-))

Tuesday, October 5, 2010

Here's to Laundry Calmness!!

I am so excited to show you what I did!! Remember the great $1 table that I glued together in the last post?? Well, here's what I did with it!!


Ok, ok, ok...I'm getting ahead of myself...

I have a great little space off of my kitchen to do laundry...(read, throw stuff into)...and it was a mess...


Just keepin' it real here...:-))


I couldn't afford a REAL makeover (tearing off that ugly wallpaper; new, front-loading washer and dryer; a little built-in storage...a girl can dream right...;-)), but I was tired of opening the door to do laundry (which I don't hate doing, much more tolerable than floors, shudder, shudder) and stepping over that awful mess.

So I pulled everything out that was on the floor...


Ahhhhh...better already!! Most of it was STUFF that needed to go, I was just being waffley...:-)) Then I put the storage shelf on top of the table...it just made sense to put the vertical space to use in that small room...


I then spurged and spent $9 for a new rag rug and window hardware...


And I even USED the great work space provided by the table for the curtain rod installation!!!


Found the perfect place for my great grandmother's jello molds...


And then the day after completing the mini-transformation, I spotted this nifty shelf at Goodwill...so for another $2.99, I got even more storage in this little space!!


I brought it home and Cloroxed the snot out of it...(and hopefully everything else icky and sticky, teehee ;-)) That purchase brought my grand total to $13 spent on renewal!! I used new-to-the-space curtains that I already had, and all the storage bins and baskets I already had...so YIPPEE!!!


Now I walk in just to admire the unclutteredness of it all...:-))) And to visit my girl...:-))