Showing posts with label Re-Use. Show all posts

Saturday, February 19, 2011

Here's to Dinos (and other old, slow things!!)

Oh, groan...It's been awhile!! I am starting this year out at a dinosaur pace...:-))

Partly because I am working more outside the home, and partly because I am kind of in a winter of creativity...but sometimes we just have to sit quietly and let the seeds of new things do the great work of preparing to grow!! And in those times it is paramount to hold onto the belief that Spring will come!! :-))

So I have a little project to share with you that I did a while back and never posted...

I started with this picture that I bought years ago at a church garage sale for $1. It was a little 80's-ish, (OK, a LOT 80's-ish) but I thought it might fill an empty space with color!!


So I had it for awhile, didn't really use it, gave it to Mom, she didn't really use it, she gave it back to me, it sat in the garage...then I got a great idea!!


I had this cool dino picture that I got at the local art institute end-of-semester sale and wanted to frame, but just hadn't found the right frame (size- and price-wise). I wanted something that would really highlight the picture and be, well, free...:-))

Oh, how I love it when things come together so serendipitously...:-))


I just disassembled the piece and removed the picture and mat, then spray painted the frame black. (I probably should have primed it, but just did a couple of coats.) Then I took it to my local Hobby Lobby and got the dino top-mounted on a medium-grey mat. The mat plus assembly fee was inexpensive (like, under $15), and saved me the trouble of putting it all back together!! :-)) This picture is closer to the true colors of the piece...


But it's fuzzy, which drives me nuts, so here it is one more time in lovely clarity!! :-))


Of course, the dinosaur craze in our household is now waning, but there is still enough interest that this will be relevant for awhile!! And it's just cool 'real' art for a kid's room!!

Sunday, December 12, 2010

Here's to Chalkin' it Up!!!


We had a LOVELY winter day last week and I was able to work outside on a few projects, so I thought I'd share one of them...

I got this frame-thingy at a thrift store awhile back, and knew that I wanted to make it a chalkboard...


It was 99 cents...:-))


It was made to accommodate an insert, so I measured the inside dimensions and cut a piece of board to slide into it...it was a super thin (about a quarter of an inch, I think) piece of plywood that I got at the local hardware store for about $4. It was actually for a different project and there was just a lot left over...then I painted the cut piece with chalkboard paint...


I was *honestly* not painting in my driveway in the middle of the night!! It was dusk when I took the pics, and turning on the flash just made it look darker...really!!! I did the recommended two coats, and then just decided to be done because I am so impatient like that!! And it works fine, but since it was unpainted wood, it would look better with more coats, so I might try to do that next spring. (Really, I should have primed, then the two coats would have been fine!!) So here it is...


I love the red color on this, and it will go great in my living room when the Christmas decorations come down!! Two more weeks!! Aaack!! :-))

Saturday, December 11, 2010

Here's to Holiday Crafting!!

Ahhh...so much time, so little to do...

Wait...other way around!!! (I love that movie!! :-) So here it is, what, two weeks til Christmas???!!! And all the little loose ends to tie up, last presents to find, traditions to keep! :-)) In the middle of everything, I thought I would try making some cute holiday servers, kind of a take-off on the cake plate I did as my very first post!!

I used super glue for glass, although I just used regular super glue the first time around, and it worked great!


Then I gathered some really cute holiday plates, votive holders, aperitif glasses, whatever caught my eye, and started playing around til I thought something worked...


These would all work as really cute candle holders, but you could also put little faux or real flower arrangements in them for use as centerpieces or decorations. I also made these two tier servers that could be used to serve dessert, appetizers like crackers and cheese, or for holding jewelry, or arrangements for a centerpiece. There are just a ton of ways to use these little beauts. That's why I thought I would make them a little more generic...


Hope your December is going just swimmingly and everyone is enjoying all the great sights, tastes, smells, and sounds of the season!!! :-))

Thursday, November 18, 2010

Here's to Imperfection!!

AAAAACK!! I was SO excited about this idea...partly because I thought it would be a brilliant way to re-use a commonly found item, and partly because I thought it would be a simple and easy little project...I WAS SO WRONG!!!!

This project was like tripping uphill!!! EVERYTHING went wrong, but let me show you...


I thought I would take these little trays, paint them up real cute-like, make a few magnets, and have an adorable way to put up notes, pictures, cards, etc. It could work as a frame or a grocery store list holder, whatever you needed...versatile and SO cute!!


Here are a few more larger trays that I was also going to transform...

The first thing to go wrong, was that I spray paint outside, and in this breezy autumn weather, the spray paint attracted EVERY tiny piece of leaf or twig within 30 yards...and that happened with EVERY coat of paint (and I had to apply several to cover the color on the trays)...so the finish wasn't nearly as ice-smooth as I wanted...

Next, I tried to stamp the trays with cute little images, *sigh*...I do stamping so rarely, that I kindof forget all the little tricks to doing it...like don't load the stamp with too much paint, and it's hard to stamp on slick surfaces...so stamping didn't go well at all...

Then I thought I better seal the trays so that the magnets wouldn't scrape the paint...great - except that the polyurethane attracted even more STUFF than the paint...ARGH!!!

At this point I wanted to rip my hair out...but my hair is my best feature, and seeing as how I am getting older, (and therefore have wrinkling, stretch marks, and age spots) I can't afford to just go mangling the one good thing I have still going for me...;-)))

SO...this lifelong, twelve-step dropout, dedicated perfectionist took a deep breath, revised my standards for this project, and persevered.

Here are the final results:


I used plate hangers that adhere to the back, but the plate hangers that clamp around the plate would work too. (another snafu - after I snapped this picture, the hanger came off the back...apparently the adhesive wasn't meant for metal...of course it wasn't...:-))...so I just super-glued it back on!!)


The magnets were supposed to be easy, too...I just used some cute little buttons that I had...


Of course the ones I chose had wire through the middle...of course they did...:-))


SO after all of that...I still like the idea of this project, I just need to figure out less time-consuming way to execute!!! And I am just going to chalk these up to *it's the first time I did this so of course they aren't perfect*!!!!

They are, however, a LOT cuter holding a picture of my J-Bro and his wife!!! :-)))

Friday, November 12, 2010

Here's to Adorable Little Boys!!

Get ready to amp up the cuteness in here!! :-)) I was so pleased with the results of this little makeover...and it was really very simple! I started with two pictures that had been given to me by sis HBAPJ (she gives me the best stuff :-))...


They had a dated look, and the frames really screamed 70's!! (They actually look much better in this picture than they did in real life!!) But their adorable little faces kept drawing me in...I just couldn't put them in the give-away pile!!


So after living with them for awhile, I decided that they needed a little revamping...spray paint, here we come!!

I took the pictures out of the frames, and sprayed the frames with an almond color that I thought would compliment the colors in the pictures better than straight white...then I distressed the frames (meaning I didn't spray paint them perfectly and when they were dry, I sanded them a bit - easy peasy!!).


Delightful, but I had one more charming idea!! I took a *smidge* of Mod Podge,thinned with a drop of water, and painted it on a few highlights in each picture, then added just a skosh of glitter...


OH SO PRECIOUS!!! (And very subtle in real life!!) I just love the hint of sparkle that catches the light, and the frames now compliment the soft colors of the boys instead of overpowering them!! What charming art for my own towhead's room!! :-))

Saturday, October 30, 2010

Here's to Halloween!!

Happy Halloween!!

I haven't been in much of a spooky mood lately...I've only done a little fall decorating this year...


I even let nature decorate my pumpkins...


But really...I couldn't have done better!! :-)))

My leafy outdoor bouquet was about as Halloweeny as I got...


But I did have a lot of fun making these autumn cards...I used an old Mary Engelbreit desk calendar that I cut up then added a little embellishment...


I am definitely not selling these (actually, if you are family, you might see one soon!! :-))...so don't worry, Mary, no copyright issues here!! :-)) It was a fun way to recycle some adorable little images and spread some autumn cheer!!

Thursday, October 28, 2010

Here's to Time!!

So here is a fun project I did recently!!


This cute little platter came in a garage sale box of other things that I wanted...I actually tried to leave it there (as I am pretty sure it is missing a glass insert of some kind that fits in the middle), but no dice!!! And I really wanted the other stuff in the box...:-)) That means I get to call this *free*, right!!


Not that I don't appreciate the silvery/flowery cuteness of it all!! But what to do with it? I almost gave it to Goodwill about three times, and just never quite could...Then inspiration hit!! A clock!

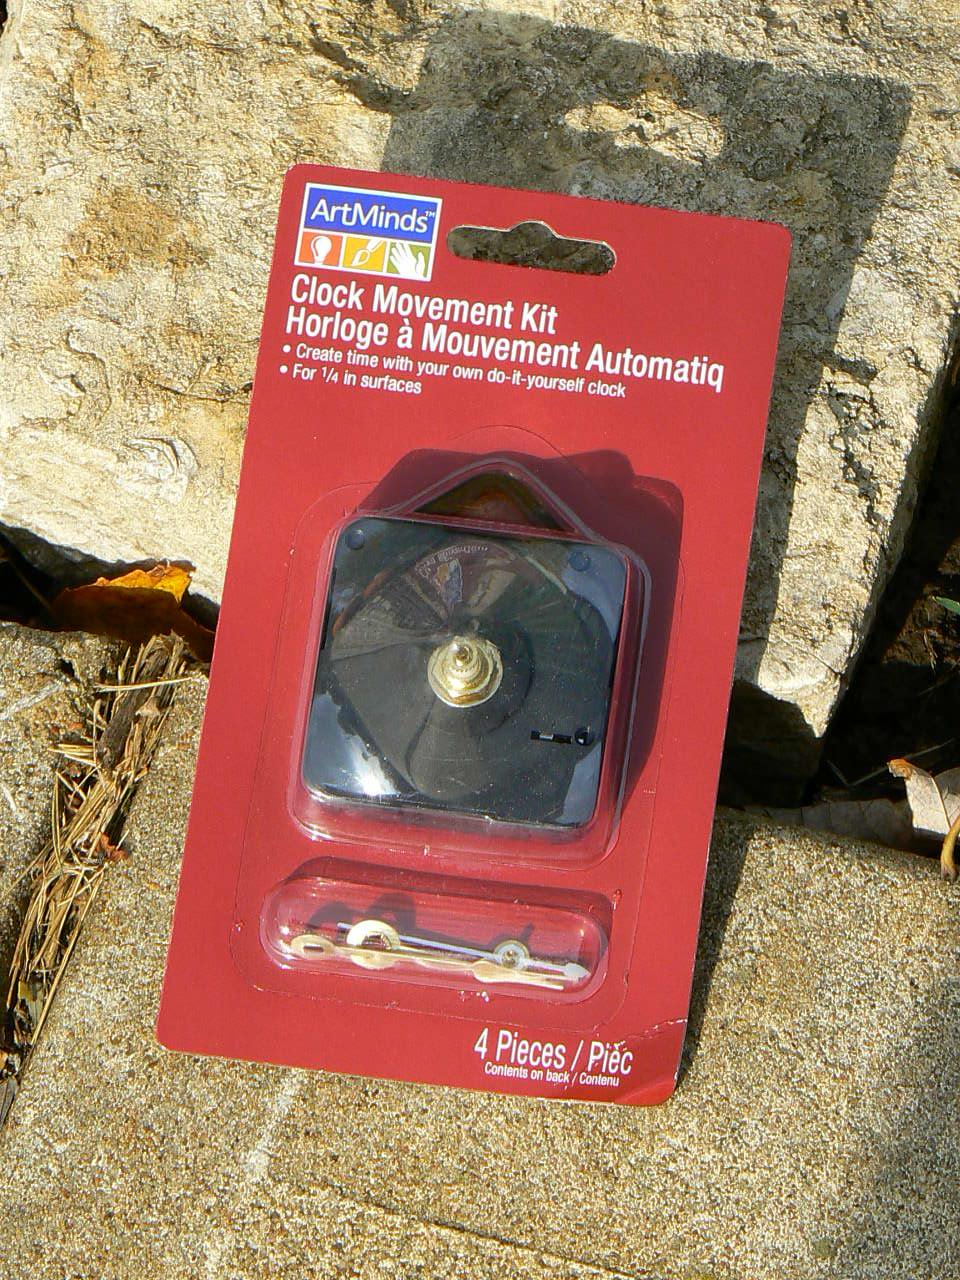
I had a hole drilled in the center of the platter (drilling is WAY past my pay grade ;-)) and bought a little clock-making kit at a craft store.


I also bought longer, black hands (that I didn't take a picture of), as the hands that came in the kit were tiny and gold-colored, not so great with a silver back drop...I thought it was HILARIOUS that the kit said I could "create time"...if only, right!!!!!


Not so hilarious were the total lack of instructions regarding assembling of said do-it-yourself time creation dohicky...But after a little bit of fiddling, I got it together...really, it was fairly straightforward and I didn't even break anything!! YES!! :-))

I finished after dark, so here is my cruddy indoor picture of the finished project...


I wasn't sure about it 'til I hung it up on the wall...so cute!! And it was really so easy...will definitely be "creating time" again soon up in here!! ;-))

Saturday, October 23, 2010

Here's to Kiddos!!! :-))

I have kiddos!! Love 'em!! So I thought I would post a few ideas I have had for entertaining them and corralling the massive amount of STUFF that comes along with the little lovelies...:-)))

I don't know about anyone else, but we seem to get a promotional mailing from the local car dealerships about twice a day...seriously!! And they often have a 'real' key that MAY start a car that we COULD win...haven't yet :-((

So one day as I was about to drop the fifteenth key in the trash, I got the brilliant idea to let child #2 have his own keyring...as he is all about driving...(Funny story - right before his third birthday he actually told us that when he turned three he could probably drive...so cute!!)


#1 - great way to reuse those FREE keys that come along, and #2 - his own keys to 'start' any engine!!


Next we have the wall of art!!

I knew when my kiddos were little that it would drive me crazy to have paper all over the frig...there had to be another way!!!

I needed a large space and a way to easily change out whatever paperwork / artwork would be displayed...enter our long empty hallway wall...the PERFECT palette!!


This hallway is so long and narrow it is terribly hard to get a good picture...but I put four small nails in the wall in a roughly trapezoidal (yup, its a word - I checked ;-)) shape. Then I wrapped twine around the nails to outline the top and bottom of the trapezoid and inside the trapezoid in an 'X' shape. (Use the word 'trapezoid' often?? teehee ;-))


I used clothespins to hold the gorgeous artwork...and voila!!


I love how easy it is to change stuff out, and it fills up the big, white, empty wall that needed something!! (And my frig is perfectly clear except for the zillion alphabet letters on it!!)

And last but not least - big machines!!


Construction equipment is serious business at our house...but I realized early on that it would just be more fun to have something to *actually* dig...so I got a couple of bags of decorative rocks (much cleaner than those gathered from the yard, since this would be an inside work-site!!), and a large, flat grocery box...great for digging, dumping, AND storing the big machines as the whole thing can be pushed under the dresser when no work is scheduled!!!